Elevate your videos by mixing audio like a pro

The best video can be ruined by terrible sound. But done properly and with creative intent, sound mixing is the key to emotion, tension and so much more
You’ve captured your footage, your on-location audio is clean and your camera mic gave you just enough reference sound to sync it all up. Awesome! Job done, right?
Not even close…
Welcome to the most overlooked – and potentially most powerful – part of your video: the creative sound mix. This is where all that raw dialogue becomes performance, background noise introduces settings and creates tension and music transforms mood and glues the whole piece together. Because great sound isn’t just about clarity, it’s about intention.
In this guide, we’ll break down how to mix sound creatively to give your video pace, presence and emotional pull. Whether you’re working in Final Cut, Premiere, Resolve or taking it into audio software like Logic for more nuanced control, here are some pointers to help you use sound to tell a story.
Final Cut is very fast to use, although pro users might find its audio features a little undercooked. It has some useful clean up features like hum removal, but its mixing method isn’t for everyone.
Sound is a tricky thing because, unlike visuals where you are looking at a single source, there are often dozens of audio cues going on. So how do you keep on top of it all? It’s all in the mix.
Be organised from the start
Good mixing starts with good organisation. Before you dive into equalisation and plugins, make sure your timeline is clean:
- Dialogue on its own tracks. Separate by speaker if you have multiple voices.
- SFX (sound effects) on a separate track. Background ambiences, footsteps, door slams, etc.
- Music on its own channel(s). This gives you freedom to adjust independently.
- Markers for transitions. Tag major scene changes or important beats to help you pace your mix.
- Name your clips as soon as you get back to your studio. Yes, I know you were in a hurry, but I promise you, you will experience bitter regret when you have eight different tracks, all called ‘Dialogue’.
- Keep that camera audio on its own track. It’s a hugely handy reference because that contains the whole conversation in the order it happened.
Tip: Use your camera’s internal mic to quickly sync external recordings. Just align the waveform spikes from a clap or peak. From there, disable the camera audio and work with the clean external track. Apps such as Final Cut and Adobe Premiere can also do this for you. Even if you are not doing the edit now, get this all synced up, marked and ready to go. Nothing saps enthusiasm for an edit more than an hour of housekeeping before you start.
Mixing music with emotion
Music can shape the viewer’s emotional journey – but only if it’s used thoughtfully. People often bury dialogue in music, but an audience quickly tunes out if they can’t follow the story.
Plus, if you’ve spent a lot of time creating those amazing visuals, if you swamp them with music you will devalue their narrative importance.
In the end, like spices in cooking, a little music can go a long way, so always look to dial it down, not up.
- Underscore, don’t overpower. Keep music under dialogue at a level that’s feeding, not fighting, the action.
- Ride the volume. Use automation to subtly raise or lower music under B-roll, montages, or to ease transitions. Making music volume dynamic stops people from tuning it out, or worse, feeling as if it’s ‘stuck on’.
- Use music to signal change. A tonal shift or rhythm break can support a narrative jump, new scene or moment of reflection. It’s not a trick you can pull off too often, but it’s amazing when it works.
- Crossfade your exits. When ending a track, fade the last few bars into ambient sound or another cue to avoid abrupt stops. It really takes people out of the moment if you just hit ‘stop’. That said, if you want to jolt your audience, it can be very effective.
Warning: Too much music can be exhausting. Silence is a powerful tool. So, if in doubt, play it back with the music on mute and ask yourself, is it really adding anything?
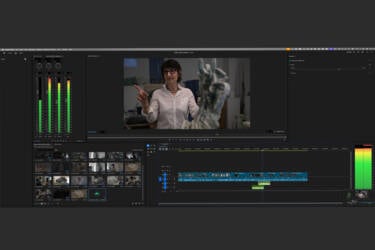
Adobe Premiere has a much more conventional mixer for audio handling, and you can do a lot in the same space. It also has other useful features for content creation like auto ‘ducking’ music so you can hear dialogue clearly, plus AI generated captions and subtitles for your footage, which are incredible time-savers.
Build atmosphere with SFX
Sound effects give texture to your world. The sound of a striking match in Hitchcock’s Strangers on a Train, the T-Rex footsteps thudding in Jurassic Park, the guys in American Werewolf in London hearing the howling in the distance – in every case we just knew there was going to be trouble.
They’re especially powerful when they match the emotional tone – not just the visual action. The recent streaming series Chernobyl was a masterclass in sound design of ominous rumbles and ‘Did you hear that?’ moments. A lot of the sounds didn’t ‘belong’ to the action you were seeing on screen, but they created an almost unbearable tension in key moments.
- Use real ambiences. Add street noise, café clatter or forest sounds to reinforce space and location. Real life is never truly ‘silent’ – there’s always something going on sonically.
- Create sonic metaphors. A distant train whistle can signal loneliness or an arrival. Thunder is an instant short cut to tension. It doesn’t have to be literal – it just has to feel right.
- Layer lightly. Three well-chosen SFX tracks (room tone, key detail, atmospheric accent) are more effective than 20 cluttered ones.
- Don’t overuse whooshes (effects which mimic something moving quickly through the air) and risers (effects which increase in volume and pitch). Save FX for when they serve a purpose – such as shifting time, adding impact or cueing suspense.
Top tip: If you are a video gamer, take notes on the sound effects and cues in great games. They can’t have constant music over the 40+ hours you’ll be playing, so they use sound to create worlds, guide your character and audibly mark significant events in your progress. The Last of Us video games are brilliant at tension and atmosphere, and a lot of these concepts are used verbatim just as effectively in the TV adaptation.
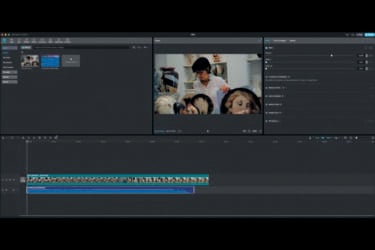
Don’t be fooled, Capcut may not be deemed a ‘pro’ editor, but it has some advanced features: AI captions, voice isolation, noise reduction – some simple clicks can make your audio really shine. You can even change your voiceover to a whole new persona! There’s also an extensive free library of FX and music to get you started.
Pacing with sound
Sound can move your story forward… or grind it to a halt. The car chases in The Fast and the Furious might not be as thrilling scored with some Nepalese nose flute music, and Romeo and Juliet wouldn’t be half as romantic backed by Motörhead’s ‘Ace of Spades’. And it’s not just the music you choose that’s important. It’s what editing choices it can give you.
To maintain energy:
- Cut to rhythm. Use music or ambient rhythms (such as footsteps or machinery) to guide visual pacing. A cut on the beat is a hundred times more effective than one that isn’t.
- Let silence breathe. A moment of quiet before a reveal adds a ton of drama.
- Avoid jarring cuts. Crossfade background ambiences across edits. That way you can smooth transitions and keep your world believable. If you have a few odd audio cuts in a row, your video will sound very ‘stuck together’. The human ear/mind is amazing at detecting these harsh edits.
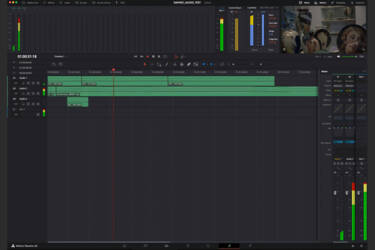
DaVinci Resolve has its own in-built audio engine called Fairlight. It’s a serious tool for audio and a cinema-level editor. Careful, though, the learning curve is seriously steep!
Smoothing the splice
One of the hardest parts of sound mixing is stitching together separate takes of dialogue.
Pro presenters or actors earn the big bucks because they can repeat dialogue perfectly – the same on take ten as take one. Us mere mortals? Not so much. I’ve lost count of the times when I’ve asked an interviewee, “That was great, but can you please cut some of that middle bit and finish with a strong statement?”
For interviews particularly, 99% of the time you will have ‘comp’, some different takes together. So always look to:
- Edit between breaths. Natural pause points help to mask cuts. It’s an easy spot for an audience when a sentence isn’t ‘finished’.
- Use room tone under every line. This creates continuity, especially when jumping between takes.
- Use B-roll or cutaways. The cutaway can hide a multitude of sins, so shoot any suitable location video while you are there. You will be eternally grateful you did.
- Belt & braces. If it’s just you, a second camera shooting another angle of a person can bail you out of a tricky edit.
- Match reverb. If one take has more echo, either tame it with de-reverb or add reverb to the drier track for consistency.
Pro tip: Dialogue edits are best done before equalisation (EQ) and compression. Always clean first, mix later.
Everything in its place
Equalisation (EQ) is where we give each element its own place in the mix according to sound frequencies, measured in hertz (Hz). You have clean dialogue, great music and effective FX, but if they are all jammed into the same frequency range, your audience will find it very confusing to discern what is what. By carving out space with EQ, you avoid muddiness and make each element easier to hear. Changing the EQ is usually done via a series of sliders on your editor which either cut or boost particular frequencies.
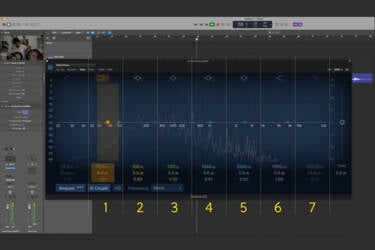
If you have a cluttered mix, EQ is your friend. Once you know which frequencies go where, you’ll be able to hear where your frequencies are building up and some judicious cuts will clear things up. Remember, a cut is always better than a boost when clearing up frequencies.
Look to declutter your sound palette:
- 80 Hz and below. Unless you’re after a thumping sub-bass, nothing should live here; it’s just mud and rumble. Cut it out.
- 100-250 Hz. Too much going on here can sound boomy, but if your sound is a little thin, this might need a little boost.
- 250-500 Hz. Here things get ‘boxy’ (too much going on and a bit unnatural) or ‘hollow’ when there’s too little in your voice track. The proximity effect (ie, the rumble of someone too close to their mic) often lives here.
- A lot of instruments, guitars, synths etc, take up this space. If they are swamping your voices, cut a little of these frequencies and turn down the music track volume as a whole.
- Things like hissy sibilants in voices turn up here. Most audio editors feature a ‘de-esser’ to get rid of these, but a simple cut might do the trick as well.
- Known as the ‘air range’, a little boost here can make voices have a presence and sweetness they might lack otherwise.
- Roll off lows (below 80 Hz). It’s just clutter and no one can hear it anyway. Conversely, slightly boost mids (1-3 kHz) for ‘presence’, giving dialogue a little more oomph in this key frequency range.
- Dip these ranges slightly where dialogue sits (typically 2-4 kHz) so it’s not fighting in this frequency. Common lead instruments such as guitars and keyboards live here, and they are usually mixed to boost the melody of a song, so it’s likely you need to dial them back for your speech to cut through.
- Accentuate what matters. A clock tick? Boost 4-7 kHz. A rumble? Emphasise 80-200 Hz.
- A quick rule of thumb. If you are boosting a track’s frequency, it usually means you can cut a lot of the rest of it, and sometimes a cut either side of a frequency can be just as effective as dialling it up.
The creator’s checklist of common audio calamities
It’s all too easy to keep building, boosting and adding layer upon layer, thinking it adds tension and drama. So at key points just go and do something else for ten minutes and come back with fresh ears.
Here are some quick things to double check if your mix has started to sound like every Star Wars battle scene playing at once.
- Too many FX. One riser is dramatic. Five are parody.
- Ignoring noise buildup. Layering multiple tracks with a low hum, or even just a ‘busy’ low-end quickly add up. Filter out or cut redundant ambiences.
- Flat levels. The reverse problem, when there’s not enough going on. A mix that stays the same volume throughout feels stale and will suck the life out of the visuals, so get dynamic with faders and crossfades.
- Harsh dialogue. Use a de-esser to tame sharp ‘S’ sounds and compress to smooth loud talkers into a more even speech.
- Levels too hot. Leave headroom, look to peak around -1 dBFS (decibels relative to full scale, a measurement of digital amplitude, where 0 dBFS is maximum), and aim for -14 LUFS (Loudness Units Full Scale – the standard unit for the perception of loudness over time) for standard web audio. It’s very easy to start an arms race in volume between your tracks.
Time to mix it up
Mixing isn’t just about fixing faults and making sure all those tracks play nicely together, – it’s about shaping the story. By being intentional with your audio, you’re inviting your audience deeper into your world.
A great soundtrack ties everything together and is just as important as your footage, helping you make a video that is a powerful, emotive audio-visual experience for your audience.
More in Videography
More by Dom Salmon

Unlock greater creativity

